Tuesday, January 19, 2010

How to Create 3D house model #2

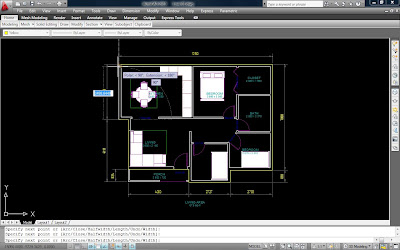
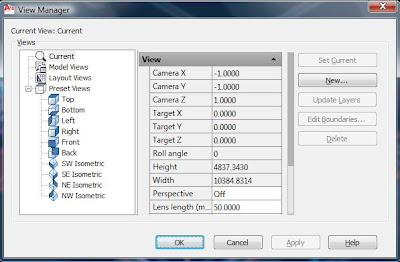
Let us continue our work from floor slab. Now we will construct wall. To construct the wall you need to draw a polyline (PL - command line) similar to the previous one around the perimeter of your plan but now on top of your floor slab. See the image. Then view it in isometric. To open the view option box - write "V" on the command line a and select SW isometric then click set current and then click OK.
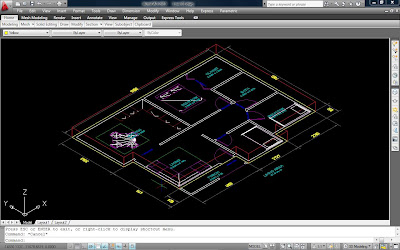

You can see that the polyline in on the bottom of your slab. Try to move it by move command (M - command line) and bring it on top of your floor slab.
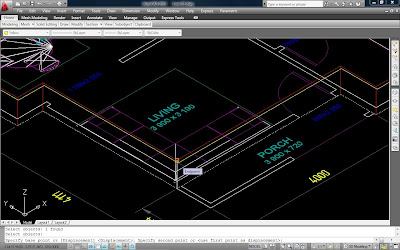
Say that the wall that you are going to construct is 150mm thick and 2750mm high. So, by using the command poly solid on the ribbon menu as you can see from the picture - click it and read the command line for the wall option.
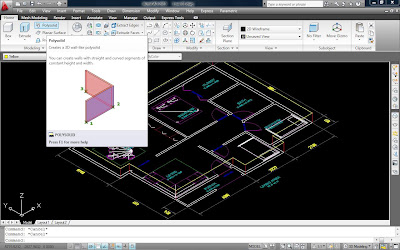
This is the command line option for the poly solid. Type 'H' and enter the wall height 2700 and then press enter. Type 'T' to input the wall thick of 150 then press enter. Type J to set the justify position by typing 'L' for left location. So the final option is you type 'O' to select the object.

When ask to select object, you can select the poly line and see the result directly.
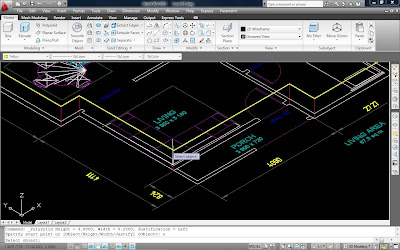

The result should be like this.
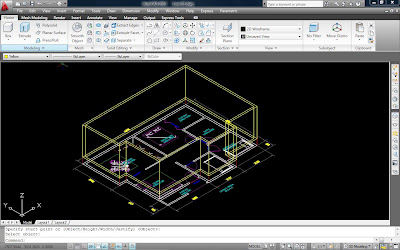
See also video tutorial for creating wall.

So with lesson you can see how the powerful AutoCAD draw a wall - it's fast and easy.

Monday, January 18, 2010

How to Create 3D house model #1

Here I want to share to all beginners of Autocad drafters & engineer on how to create or build a 3d model house. This is a step by step tutorial so. I hope everyone can follow with my tutorial lesson. For 3d presentation we usually concern on the exterior design. So, all the enterior design we will deal in separate lesson.


Say you have finish draw you floor plan of your house (like above image) and now you are ready to construct your house in 3d model. This plan is in mm so i hope you use mm plan also to follow this lesson. The first thing you have to construct is your floor slab - usually a house is elevated from the ground level about 600mm. In order to draw this floor slab you have to draw a polyline around your floor layout. See picture below. The line color red is polyline around the perimeter of your floor plan.


Then you can use the command "EXTRUDE" from comman line or from the icon and click to the polyline and input the height 600mm. The result you can see from the isometric view command.

So now you have a solid floor slab as you can see from the image above.

Thursday, January 7, 2010

How to make Hip Roof

To those AutoCad Drafters that is ready to step up their skill from 2d to 3d modeling, here I would like to share some of my 3d modelling technique in constructing a Hip roof. Below are the steps related to the slide show that i make.
1. Set your space view to front view space.

2. Create a triangle-1 the base lenght of 10m and 30 degrees side slopemake sure that after you draw this triangle - you convert the triangle line into polyline.

3. Creat another triangle-2 with base length of 15m and the same 30 degrees slope. The same as the 1st triangle you have to convert the line into polyline.

4. Then change your view to top view and then change it to isometric view as you can see from the image and change the color of the smaller triangle to red and the bigger one to blue.

5. Extrude the smaller triangle to 15m.

6. Extrude the bigger one to 10m.

Now you have 2 solid triangle.

7. Use "ALIGN" comand to align the red Solid triangle to the bigger blue one as in you can see from the image. Make sure you pick the corner point as indicated in the image.

8. After you solid trangle has been align as in the inmage, select the INTERSEC command from the tool bar. (See video) The click both solid trangle and press enter.
You should have the same rood as in the image.


Wednesday, December 23, 2009

3d Modeling in AutoCad 2010


This is my latest 3d model that I design - which I rendered it in AutoCad 2010... With their new additional features for 3d modeling command makes it easier to handle and control your model such as the cube for rotating your model, sweep command which is very useful in extruding the Gutter of the roof and moldings. Also the Press & pull commands accelerate your efficiency in creating a hole on the wall for windows and doors. And for the rendering - well pretty much impressive as you can see with the result of the image.

Saturday, November 28, 2009

Ceiling Design


This is my new nice ceiling design for living area with lighting effect.

Thursday, November 12, 2009

My 3D House


Walla!.. This is our House in Dumagute City. It's half finish right now but i'm glad before it was constructed I've already seen it just as I rendered it in AutoCAD. This two image shows you in 3d wireframe and rendered model where I use the Geographic location option so that I can see almost the same shadow effect as in actual by sun calculator.

3D House Modelling


Well for me when it comes to rendering your model in AutoCAD – it takes a lot of adjustment… I usually use only the Sun light options & Geographic location for day light scene – and yet we still can get pretty much impressive outcome of my AutoCAD 3D model. But for those who want to render in night effect, you can use it the AutoCAD light command such as the distant light, point light and web though the adjustment pretty much difficult but it’s a worthwhile to learn. So here let me share you some of my AutoCAD 3d house model that i made.